# Table of Contents
# 스프링 외부 설정
스프링은 설정값을 소스코드에서 분리하여 외부에 위치시킬 수 있는 여러가지 방법을 제공한다. 이를 외부 설정(Externalized Configuration)이라고 한다. 또한 설정값 하나하나를 프로퍼티(Property)라고 한다.
스프링에서는 자주 사용되는 외부 설정 방법은 다음과 같다.
@PropertySourceapplication.properties또는application.yml파일
# @PropertySource, @PropertySources
@PropertySource를 사용하면 .properties확장자의 외부 설정파일에 정의된 Key-Value 값을 프로퍼티로 읽어올 수 있다.
WARNING
기본적으로 .properties 확장자만 읽을 수 있으며, .yml확장자를 사용하려면 별도의 설정이 필요하다.
예제를 살펴보자. src/main/resources에 database.properties 파일을 다음과 같이 정의하자.
database.url=dbc:mysql://localhost:3306/test
database.username=root
database.password=1234
이 값은 컴포넌트에서 @PropertySource로 읽어올 수 있다. 어노테이션의 인자로 파일의 경로를 지정해야한다.
@Configuration
@PropertySource("classpath:database.properties")
public class DatabaseConfig {
    // ..
}
이 값들은 ApplicationContext의 Environment에 저장되며, 다음과 같이 사용할 수 있다.
@Configuration
@PropertySource("classpath:database.properties")
public class DatabaseConfig {

    @Autowired
    ApplicationContext applicationCtx;

    @Bean
    public DatabaseClient databaseClient() {
        Environment env = applicationCtx.getEnvironment();
        String databaseUrl = env.getProperty("database.url");
        String databaseUsername = env.getProperty("database.username");
        String databasePassword = env.getProperty("database.password");
        return new DatabaseClient(databaseUrl, databaseUsername, databasePassword);
    }
}
PropertySourcesPlaceholderConfigurer객체를 빈으로 등록하면 다음과 같이 @Value 어노테이션으로 속성값을 주입할 수 있다.
@Configuration
@PropertySource("classpath:database.properties")
public class DatabaseConfig {

    @Value("${database.url}")
    private String url;

    @Value("${database.username}")
    private String username;

    @Value("${database.password}")
    private String password;

    @Bean
    public static PropertySourcesPlaceholderConfigurer propertySourcesPlaceholderConfigurer() {
        return new PropertySourcesPlaceholderConfigurer();
    }

    @Bean
    public DatabaseClient databaseClient() {
        return new DatabaseClient(url, username, password);
    }
}
@PropertySources을 사용하면 여러 외부 설정파일을 읽어올 수 있다.
# a.properties
a.key1=aValue1
# b.properties
b.key1=bValue1
@PropertySources({
    @PropertySource("classpath:a.properties"),
    @PropertySource("classpath:b.properties")
})
public class TestConfig {

    @Value("${a.key1}")
    private String aKey1;

    @Value("${b.key1}")
    private String bKey1;

    // ..
}
# @TestPropertySource, @TestPropertySources
테스트 환경에서는 @TestPropertySource을 사용하여 외부 설정파일을 읽어올 수 있다. src/test/resources에 test.properties 파일을 생성한다.
test.key1=value1
test.key2=value2
이제 다음과 같이 사용할 수 있다.
@SpringBootTest
@TestPropertySource("classpath:test.properties")
class ApplicationTests {

    @Value("${test.key1}")
    String testKey1;

    @Value("${test.key2}")
    String testKey2;

    @Test
    public void test() {
        assertThat(testKey1).isEqualTo("value1");
        assertThat(testKey2).isEqualTo("value2");
    }
}
@TestPropertySource어노테이션의 properties 속성으로 개별 프로퍼티를 추가할 수 있다.
@SpringBootTest
@TestPropertySource(
    locations = "classpath:test.properties",
    properties = {"person.name=paul", "person.nation=usa"}
)
public class TestControllerTest {

    @Value("${person.name}")
    private String personName;

    @Value("${person.nation}")
    private String personNation;

    @Test
    public void test() throws Exception {
        assertThat(personName).isEqualTo("paul");
        assertThat(personNation).isEqualTo("usa");
    }
}
@TestPropertySources로 여러 프로퍼티 파일을 적용할 수도 있다.
# a.properties
a.key1=aValue1
# b.properties
b.key1=bValue1
@SpringBootTest
@TestPropertySources({
        @TestPropertySource("classpath:a.properties"),
        @TestPropertySource("classpath:b.properties")
})
class ApplicationTests {
    @Value("${a.key1}")
    String aKey1;

    @Value("${b.key1}")
    String bKey1;

    @Test
    void test() {
        assertThat(aKey1).isEqualTo("aValue1");
        assertThat(bKey1).isEqualTo("bValue1");
    }
}
# application.properties, application.yml
스프링 부트는 어플리케이션을 구동할 때 src/main/resources 경로의 application.properties 또는 application.yml을 로딩한다. 이 파일에 Key-Value 형식으로 값을 정의하면 어플리케이션에서 참조하여 사용할 수 있다. 보통 어플리케이션의 다양한 설정값들을 이 파일에 정의한다.
# 예제
src/main/resources에 application.properties 생성한다.
# application.properties
value.first=aaa
value.second=bbb
.properties 확장자 대신 .yml 확장자를 사용할 수도 있다. application.yml 파일은 다음과 같다.
# application.yml
value:
  first: aaa
  second: bbb
이제 컴포넌트에서 다음과 같은 방식으로 값을 읽어올 수 있다.
// TestController.java
@RestController
@RequestMapping("/test")
public class TestController {

    @Value("${value.first}")
    private String first;

    @Value("${value.second}")
    private String second;

    @GetMapping("/test")
    String main() {
        return first + " " + second;
    }
}
# 다른 application.properties 포함하기
spring.profiles.include을 사용하면 다른 프로퍼티 파일을 포함할 수도 있다.
# application.properteis
spring.profiles.include=sub

origin.name1=originValue1
origin.name2=originValue2
# application-sub.properties
origin.name2=subValue2
sub.name1=subValue1
@RestController
@RequestMapping("/test")
public class TestController {

    @Value("${origin.name1}")
    String originName1;     // originValue1

    @Value("${origin.name2}")
    String originName2;     // subValue2

    @Value("${sub.name1}")
    String subName1;        // subValue1

    // ...
}
# 단위 테스트에서의 application.properties
test/java/resources에 application.properties를 생성하면 테스트 환경에서는 main/java/resources/application.properties 대신 test/java/resources/application.properties을 사용하게 된다.
# main/java/resources/application.properties
test.key1=value1
test.key2=value2
test.key3=value3
주의할 점은 test/java/resources/application.properties가 main/java/resources/application.properties의 모든 속성을 포함해야한다.
# test/java/resources/application.properties
test.key1=newValue1
test.key2=newValue2
test.key3=newValue3
@SpringBootTest
public class TestControllerTest {

    @Value("${test.key1}")
    private String testKey1;

    @Value("${test.key2}")
    private String testKey2;

    @Value("${test.key3}")
    private String testKey3;


    @Test
    public void test() throws Exception {
        assertThat(testKey1).isEqualTo("newValue1");
        assertThat(testKey2).isEqualTo("newValue2");
        assertThat(testKey3).isEqualTo("newValue3");
    }
}
# @ConfigurationProperties
@ConfigurationProperties을 사용하면 application.properties 또는 application.yml의 프로퍼티를 클래스의 멤버변수로 바인딩할 수 있다.
다음과 같이 application.properties가 있다고 가정하자.
## application.properties
user-info.email=paul@gmail.com
user-info.name=paul
user-info.age=30
별도의 클래스를 정의한 후 @ConfigurationProperties 어노테이션으로 속성값을 클래스에 바인딩할 수 있다.
package com.yologger.samples.external_configuration;

import org.springframework.boot.context.properties.ConfigurationProperties;

@ConfigurationProperties(prefix = "user-info")
@Configuration
public class UserInfoProperties {
    private String email;
    private String name;
    private int age;

    public String getEmail() {
        return email;
    }

    public void setEmail(String email) {
        this.email = email;
    }

    public String getName() {
        return name;
    }

    public void setName(String name) {
        this.name = name;
    }

    public int getAge() {
        return age;
    }

    public void setAge(int age) {
        this.age = age;
    }
}
해당 클래스는 어플리케이션 내에서 다음과 같이 주입받을 수 있다.
@RestController
@RequestMapping("/test")
public class TestController {

    @Autowired UserInfoProperties userInfoProperties;

    @GetMapping("/test")
    public String test() {
        return userInfoProperties.getEmail() + userInfoProperties.getName() + userInfoProperties.getAge();
    }
}
@Configuration 대신 @EnableConfigurationProperties을 사용할 수도 있다. @EnableConfigurationProperties은 @ConfigurationProperties어노테이션이 붙은 클래스를 빈으로 등록해준다.
package com.yologger.samples.external_configuration;

import org.springframework.boot.context.properties.ConfigurationProperties;

@ConfigurationProperties(prefix = "user-info")
// @Configuration
public class UserInfoProperties {
    // ...
}
@SpringBootApplication
@EnableConfigurationProperties(UserInfoProperties.class)
public class Application {

    public static void main(String[] args) {
        SpringApplication.run(Application.class, args);
    }
}
# 테스트 어노테이션의 properties 속성
@SpringBootTest, @DataJpaTest 같은 테스트 어노테이션의 properties속성으로 프로퍼티를 추가할 수 있다. 이미 존재하는 프로퍼티는 덮어쓴다.
# main/java/resources/application-test.properties
test.key1=value1
test.key2=value2
@SpringBootTest(
        properties = {"test.key2=newValue2", "test.key3=newValue3"}
)
@ActiveProfiles("test")
public class TestControllerTest {

    @Value("${test.key1}")
    private String testKey1;    // value1

    @Value("${test.key2}")
    private String testKey2;    // newValue2

    @Value("${test.key3}")
    private String testKey3;    // newValue3


    @Test
    public void test() throws Exception {
        assertThat(testKey1).isEqualTo("value1");
        assertThat(testKey2).isEqualTo("newValue2");
        assertThat(testKey3).isEqualTo("newValue3");
    }
}
# 프로퍼티 우선순위
이처럼 프로퍼티는 다양한 방법으로 설정할 수 있기 때문에 프로퍼티 간 우선순위가 존재한다.
spring-boot-devtools를 활성화 시켰을 때$HOME/.config/spring-boot디렉토리에 안에서 제공하는 프로퍼티- 테스트에 사용한
@TestPropertySource가 제공하는 프로퍼티 @SpringBootTest또는 슬라이스 테스트용 애노테이션의properties속성으로 제공하는 프로퍼티- 커맨드 라인 아규먼트
SPRING_APPLICATION_JSON환경변수 또는 시스템 프로퍼티에 인라인 JSON으로 정의되어 있는 프로퍼티ServletConfig초기 매개변수ServletContext초기 매개변수java:comp/env에 들어있는 JNDI 애트리뷰트- 자바 시스템 프로퍼티 (
System.getProperties()) - 운영체제 환경 변수
RandomValuePropertySource.random접두어를 가지고 있는 프로퍼티,random.*에 무작위 값을 제공하는 프로퍼티 소스.- JAR 패키지 외부에 있는 특정 프로파일용 애플리케이션 프로퍼티. (
application-{profile}.properties또는application-{profile}.yml) - JAR 패키지 내부에 있는 특정 프로파일용 애플리케이션 프로퍼티. (
application-{profile}.properties또는application-{profile}.yml) - JAR 패키지 외부에 있는 애플리케이션 프로퍼티. (
application.properties또는application.yml) - JAR 패키지 내부에 있는 애플리케이션 프로퍼티. (
application.properties또는application.yml) @Configuration클래스에 사용한@PropertySource로 읽어들인 프로퍼티SpringApplication.setDefaultProperties()로 설정할 수 있는 기본 프로퍼티
예제를 살펴보자. src/main/resources의 application.properties는 다음과 같다.
test.key1=value1
test.key2=value2
src/test/resources의 settings.properties는 다음과 같다.
test.key2=newValue2
test.key3=newValue3
테스트 코드는 다음과 같다.
@SpringBootTest
@TestPropertySource("classpath:settings.properties")
public class TestControllerTest {

    @Value("${test.key1}")
    private String testKey1;    // value1

    @Value("${test.key2}")
    private String testKey2;    // newValue2

    @Value("${test.key3}")
    private String testKey3;    // newValue3

    @Test
    public void test() throws Exception {
        assertThat(testKey1).isEqualTo("value1");
        assertThat(testKey2).isEqualTo("newValue2");
        assertThat(testKey3).isEqualTo("newValue3");
    }
}
src/main/resources의 application.properties는 우선순위가 15이다. 반면 @TestPropertySource로 제공한 프로퍼티는 우선순위가 2다. 따라서 @TestPropertySource로 제공한 프로퍼티가 적용되며 중복된 프로퍼티는 덮어쓴다.
# Profile
개발, 테스트, 운영 환경에 따라 다른 설정값을 사용할 수 있다. 이를 위해 스프링은 프로파일(Profile)이라는 기능을 제공한다.
프로파일을 활성화시키는 방법은 다음과 같다. 앱을 실행할 때 -Dspring.profiles.active로 활성화시킬 프로파일을 지정하면 된다.
$ java -Dspring.profiles.active=dev -jar [app_name].jar
$ java -Dspring.profiles.active=prod -jar [app_name].jar
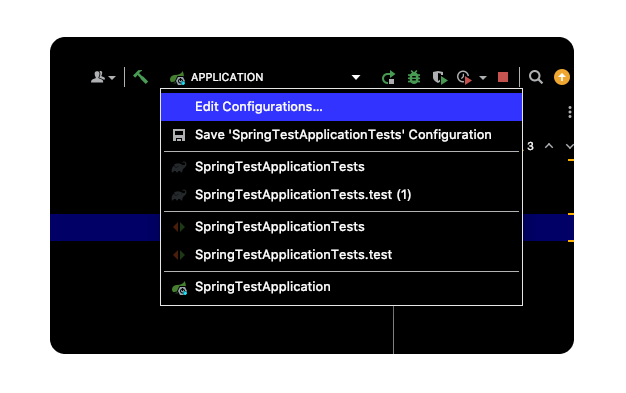
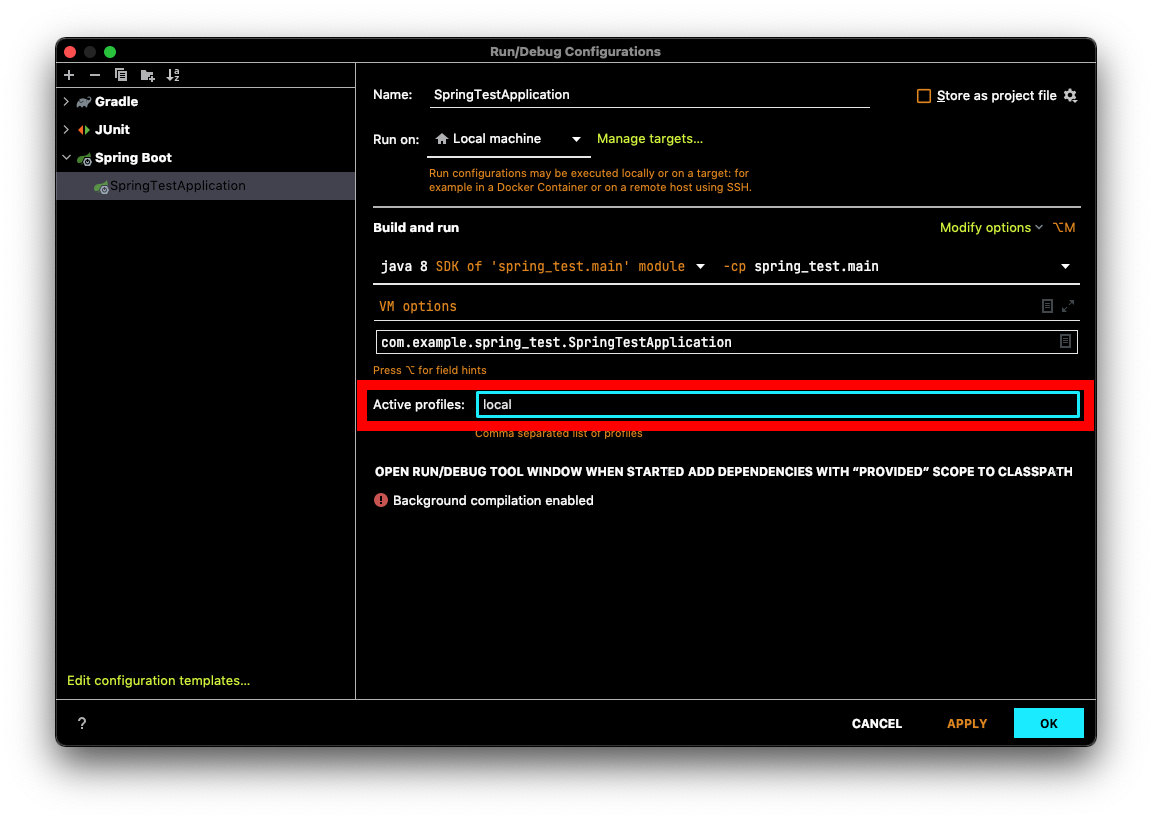
IntelliJ에서는 어플리케이션의 Edit Configurations로 이동한 후 spring.config.activate.on-profile에다가 활성화시킬 프로파일을 지정하면 된다.
이제 활성화된 프로파일에 따라 다른 설정값을 사용하는 다양한 방법에 대해 알아보자.
# Profile과 application.properties
활성화된 프로파일에 따라 다른 application.properties 파일을 사용할 수 있다. application-{profile}.properties 형태로 파일을 정의하면 된다. 로컬, 개발, 운영 환경에 따라 파일을 정의해보자.
application.properties: 공통 속성값 정의application-local.properties: 로컬 환경에서 사용할 속성값 정의application-dev.properties: 개발 환경에서 사용할 속성값 정의application-prod.properties: 운영 환경에서 사용할 속성값 정의
# application.properties
value.first=aaa
value.second=bbb
이때 spring.config.activate.on-profile에 어떤 파일을 사용할지 지정한다.
# application-local.properties
spring.config.activate.on-profile=local

value.second=local
value.thrid=local
# application-dev.properties
spring.config.activate.on-profile=dev

value.second=dev
value.thrid=dev
# application-prod.properties
spring.config.activate.on-profile=prod

value.second=third
value.thrid=third
이제 앱을 실행할 때 -Dspring.profiles.active로 활성화시킬 프로파일을 지정하면 된다.
$ java -Dspring.profiles.active=dev -jar [app_name].jar
$ java -Dspring.profiles.active=prod -jar [app_name].jar
보통 application.properties에는 공통 설정값을 작성한다. 그리고 application-{profile}.properties에는 환경에 따라 달라지는 설정값을 작성한다. 또한 application.propeties의 속성값을 application-{profile}.properties에도 정의하면 덮어쓰게 된다.
테스트 환경에서도 appication-{profile}.properties형태로 파일을 분리할 수 있다.
# src/main/resources/application.properties
value.first=aaa
value.second=aaa
src/test/resources의 설정 파일이 src/main/resources 설정 파일의 모든 속성을 포함해야한다는 점에 주의하자.
# src/test/resources/application.properties
value.first=testaaa
value.second=testaaa
# src/test/resources/application-test.properties
spring.config.activate.on-profile=test

value.second=testbbb
value.third=testccc
이제 테스트 코드에서 @ActiveProfiles 어노테이션으로 활성화시킬 프로파일을 지정하면 된다.
@SpringBootTest
@ActiveProfiles(profiles = {"test"})
class SpringTestApplicationTests {

    @Value("${value.first}")
    String first;

    @Value("${value.second}")
    String second;

    @Value("${value.third}")
    String third;

    @Test
    void test() {
        assertThat(first).isEqualTo("testaaa");
        assertThat(second).isEqualTo("testbbb");
        assertThat(third).isEqualTo("testccc");
    }
}
# Profile과 @PropertySource
활성화된 Profile에 따라 다른 설정파일을 로드할 수도 있다.
@Configuration
@PropertySource("classpath:database-${spring.profiles.active}.properties")
public class Config {
    // ...
}
# @Profile 어노테이션
@Profile을 사용하면 활성화된 프로파일에 따라 다른 구성 클래스를 사용할 수 있다.
예제를 살펴보자. 다음과 같은 클래스가 있다.
public class NetworkManager {

    private String endpoint;

    public NetworkManager(String endpoint) {
        this.endpoint = endpoint;
    }

    public String getEndpoint() {
        return endpoint;
    }

    public void setEndpoint(String endpoint) {
        this.endpoint = endpoint;
    }

    // ...
}
NetworkManager가 사용하는 endpoint를 개발환경과 운영환경에 따라 다르게 설정하고 싶다. 이를 위해 두 개의 설정클래스를 다음과 같이 정의할 수 있다.
@Configuration
@Profile("dev")
public class DevConfig {

    @Bean
    public NetworkManager networkManager() {
        return new NetworkManager("dev.com");
    }
}
@Configuration
@Profile("prod")
public class ProdConfig {

    @Bean
    public NetworkManager networkManager() {
        return new NetworkManager("prod.com");
    }
}
이제 프로파일을 dev로 설정하면 DevConfig가 활성화되며, endpoint가 dev.com인 NetworkManager가 빈으로 등록된다.
$ java -Dspring.profiles.active=dev -jar [app_name].jar
프로파일을 prod로 설정하면 ProdConfig가 활성화되며, endpoint가 prod.com인 NetworkManager가 빈으로 등록된다.
$ java -Dspring.profiles.active=prod -jar [app_name].jar
다음과 같이 클래스 레벨이 아니라 메소드 레벨로도 설정할 수 있다.
@Configuration
public class CommonConfig {

    @Bean(name = "networkManager")
    @Profile("local")
    public NetworkManager networkManagerLocal() {
        return new NetworkManager("local.com");
    }

    @Bean(name = "networkManager")
    @Profile("prod")
    public NetworkManager NetworkManagerProd() {
        return new NetworkManager("prod.com");
    }
}
테스트 환경에서는 @ActiveProfies어노테이션으로 활성화시킬 프로파일을 지정할 수 있다.
@SpringBootTest
@ActiveProfiles(profiles = {"local"})
class Test {

    @Autowired
    NetworkManager networkManager;

    @Test
    public void test() {
        assertThat(networkManager.getEndpoint()).isEqualTo("local.com");
    }
}
# @ActiveProfiles
테스트 환경에서는 @ActiveProfiles 어노테이션으로 활성화시킬 프로파일을 지정할 수 있다.
@SpringBootTest
@ActiveProfiles(profiles = {"local"})
class Test {
    // ...
}